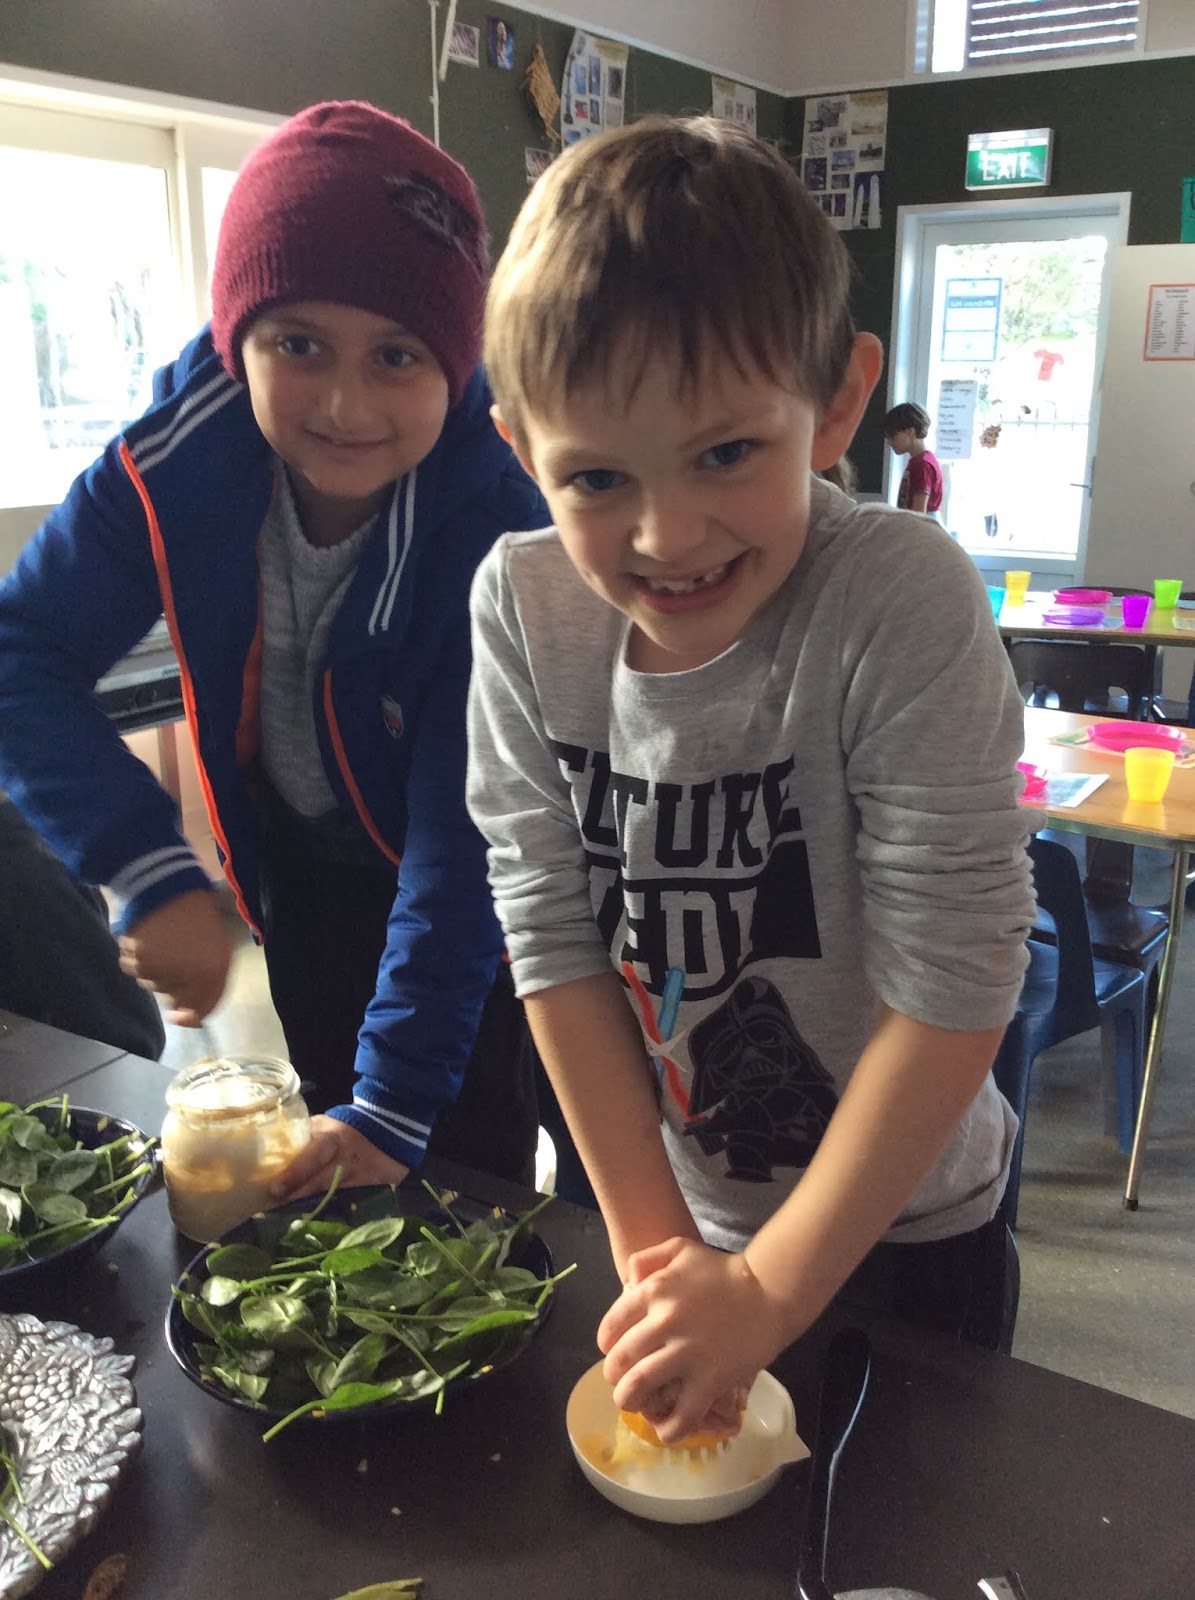
Today the Savage Sixteen's had our first Garden to Table experience. Our Year 3's had a blast in the kitchen and garden and can't wait for the next session. They are going to make graphs of the food they ate at each session to show their parents what they liked best!
Here are some photos of the children learning knife skills, cooking and baking, weeding and planting!
Monday, 24 February 2020
G2T 13/14 Group 2
Today, Room 13/14's Group 2 had their first session at Garden to Table. This was the first time the Year 3's had been exposed to the programme. They had a great time. Here are some of the photos that were taken:
Tuesday, 17 September 2019
Ruma Waru LOVE Garden to Table
We have been so fortunate to be part of this fantastic learning experience and are very grateful to Whaea Lee, who has been running it, and our sensational parents who have been supporting us.


Wednesday, 27 June 2018
Week 7 & 8
This week in the kitchen
We made corn bread, black bean salsa and guacamole. Our sweet treat was macadamia nut chocolate.
We were given some reed avocados so we used them for the mousse and the salsa. We also put pineapple in our salsa.
We also got given some macadamias so we roasted them and used them to make the crushed nut chocolate. Yummy!
| Yummy Macadamia Chocolate |
| Pedram loved the corn bread! |
Sharing a meal together |
Standout children were:
Cooper for making salad and loving eating the lemons!
Daniel for stirring the chocolate.
Oliver Reeve for being a beetroot grating machine and for trying beetroot even though he didn't really like it.
Extras
Room 13 helped out with hangi preparations - we made salads to accompany the hangi. Coleslaw and grated beetroot and carrot.
Room 14 made a lovely roast vegetable salad for teachers with some of the left over hangi vegetables. The teachers loved it.
| Cooper and Jashan making dressing for the teachers salad |
| Oliver grating beetroot - what a champ! |
| Laila and Amelia about to go and deliver the salad to the staffroom |
| Look at all those hangi prep peelings in the compost! |
| Busy work |
Weeks 5 & 6
Curry Week!
This week in the kitchen we made a pumpkin, cauliflower and chickpea curry. We also made a rice pilaf. One group had to grind the spices, garlic and ginger with a mortar and pestle. Our sweet was a buttermilk pancake with rhubarb and orange compote.
Yum! we all loved it.
Meanwhile in the garden
The seeds and seedlings are growing, and we are weeding and collecting materials for our compost.
Standout children this week were:
Luke, Sabine, Jordan and Sebastian for their excellent cutting skills
Laila and Shelby for eating up a storm.
This week in the kitchen we made a pumpkin, cauliflower and chickpea curry. We also made a rice pilaf. One group had to grind the spices, garlic and ginger with a mortar and pestle. Our sweet was a buttermilk pancake with rhubarb and orange compote.
Yum! we all loved it.
| Clearing the tables after we have eaten |
Meanwhile in the garden
The seeds and seedlings are growing, and we are weeding and collecting materials for our compost.
| Hector and the skink |
| Our seed raising trays |
Standout children this week were:
Luke, Sabine, Jordan and Sebastian for their excellent cutting skills
Laila and Shelby for eating up a storm.
Monday, 25 June 2018
Week 3 & 4
Session 2 - Weeks 3 & 4
We are getting into the swing of things now and our second sessions at garden to table were great.
In the garden
In the garden we have been busy planting seeds and we planted some brassica seedlings in our garden. We are also getting our compost and worm farms in good working order.
In the kitchen
This week we made silverbeet muffins with onion jam and herb butter.
We also made honeycakes for our sweet treat.
We are getting into the swing of things now and our second sessions at garden to table were great.
In the garden
In the garden we have been busy planting seeds and we planted some brassica seedlings in our garden. We are also getting our compost and worm farms in good working order.
In the kitchen
This week we made silverbeet muffins with onion jam and herb butter.
We also made honeycakes for our sweet treat.
Evie baking muffins
Shaking cream to make butter
Daniel the onion stirrer
Oliver's herb chopping skills
Stand out children this week were:
Daniel for being a champion onion jam chef
Enere for loving the onion jam and herb butter
Laila for being great at dishes
Amelia C for always looking for more work to do in the kitchen.
Knife Skills at Garden to table
Knife Skills
Written By Hannah Denton - our kitchen expert at garden to table
To help your kids develop these skills - and to get them whipping up food in your own kitchen - here are some simple tips for fostering knife skills at home. These are tips recommended by Garden to Table ambassador Al Brown and skills we’ve begun fostering in the kitchen. We encourage you to experiment with your kiddos and see what works best for them!
Firstly, several key rules in the garden to table kitchen should also apply at home. We never let the kids use knives without adult permission and supervision. Because we have amazing help from volunteer parents, our kids work in groups of 3 or 4 kids per adult.
Stand at the right height
Kitchen counters are built so they are just the right height for most people. You want your kids to stand on a stool or chair that puts the counter at about waist height. They should be able to clearly see what they are cutting. At school we use trestle tables and benches in the technology room that are lower than normal kitchen counters.Holding the knife
We’ve seen in the kitchen there is no one way the kids hold the knife. Some of this is due to the strength they have in their wrists. However, there are few general rules to adhere to. You want the kids holding the knife in their dominant hand with the bulk of their fingers wrapped around the handle. The kids will usually rest a thumb or thumb and pointer finger on the top of the handle and blade.
It is important to ensure the fingers wrapped around the handle do not come forward to the blade.
Holding the produce
We have taught the kids two types of grip to hold their produce. The “claw grip” and the “bridge grip.”
Bridge Grip
See if they can demonstrate these to you at home. We also explain to place the flat part of the produce on their chopping board to prevent the item rocking away. We’ve found this instruction needs constant reiterating as they forget to turn the produce over when they are excited.
For the claw grip, hold vegetables with the tips of your fingers resting on top of the vegetable and your thumb tucked behind the rest of your fingers. This is called a claw grip as your hand looks like a bear claw with the fingers tucked in so your knuckles are closest to the knife. This grip can be used with most types of produce.
For the bridge grip, you make a bridge with your thumb and fingers firmly pushing down on the produce. The knife then goes underneath your “bridge” so your hand is completely safe and cannot be cut. This grip may be difficult for younger children due to the size of their hands compared the knife, but is a good one to demonstrate and use for children with bigger hands.
Other considerations.
The kids are working towards their knife license. As well as showing proficiency with knife skills, they also need to demonstrate knife safety.
Part of using a knife safely is knowing how to walk around the kitchen and pass the knife. First, encourage your kids to always keep their hand on the handle and make sure the knife is never pointed at anybody – including themselves! When walking around the kitchen carry the knife down by your side with the point facing down to the floor. When passing a knife, makes sure the other person can grab the handle and does not need to touch the blade. It may be safer to put the knife down on the bench and let someone else pick it up.
To wash the knife we have explained to the kids to only put a knife into a sink of soapy water when they are able to wash it up immediately themselves. If they can’t do that straight away, leave the knife on the bench next to the sink in clear sight. A knife can be easily hidden in a sink of soapy water and someone could cut their hand on it if they don’t know it is there. When drying the knife, keep one hand on the handle, and wipe the blade with a tea towel, running your hand along the blunt side of the blade.
We hope these tips help you with the kids in the kitchen. We’re blown away with how their skills are progressing and their interest in cooking food. Be sure to check in to the Garden to Table blog as we will post photos and recipes of the kids growing, cooking and enjoying their kai.
See if they can demonstrate these to you at home. We also explain to place the flat part of the produce on their chopping board to prevent the item rocking away. We’ve found this instruction needs constant reiterating as they forget to turn the produce over when they are excited.
For the claw grip, hold vegetables with the tips of your fingers resting on top of the vegetable and your thumb tucked behind the rest of your fingers. This is called a claw grip as your hand looks like a bear claw with the fingers tucked in so your knuckles are closest to the knife. This grip can be used with most types of produce.
For the bridge grip, you make a bridge with your thumb and fingers firmly pushing down on the produce. The knife then goes underneath your “bridge” so your hand is completely safe and cannot be cut. This grip may be difficult for younger children due to the size of their hands compared the knife, but is a good one to demonstrate and use for children with bigger hands.
Other considerations.
The kids are working towards their knife license. As well as showing proficiency with knife skills, they also need to demonstrate knife safety.
Part of using a knife safely is knowing how to walk around the kitchen and pass the knife. First, encourage your kids to always keep their hand on the handle and make sure the knife is never pointed at anybody – including themselves! When walking around the kitchen carry the knife down by your side with the point facing down to the floor. When passing a knife, makes sure the other person can grab the handle and does not need to touch the blade. It may be safer to put the knife down on the bench and let someone else pick it up.
To wash the knife we have explained to the kids to only put a knife into a sink of soapy water when they are able to wash it up immediately themselves. If they can’t do that straight away, leave the knife on the bench next to the sink in clear sight. A knife can be easily hidden in a sink of soapy water and someone could cut their hand on it if they don’t know it is there. When drying the knife, keep one hand on the handle, and wipe the blade with a tea towel, running your hand along the blunt side of the blade.
We hope these tips help you with the kids in the kitchen. We’re blown away with how their skills are progressing and their interest in cooking food. Be sure to check in to the Garden to Table blog as we will post photos and recipes of the kids growing, cooking and enjoying their kai.
Subscribe to:
Posts (Atom)